fancy fat cat {mini tutorial}

Welcome to my stop on the #quiltnon2016 weekend of quilting fun! Here I'll share with you a tutorial for the fancy fat cat 6" block.
I think my modern quilting radar might be a bit broken because I wasn't even aware the biggest event in modern quilting - Quiltcon - was coming up until Julie posted about hosting #quiltnon2016 for those people who weren't going. I jumped at the chance to share a block tutorial and get in on the fun. And so far it really has been a blast to follow along on Instagram. Now it's my turn to host and share with you a mini tutorial for this 6" fancy fat cat block.
I think my modern quilting radar might be a bit broken because I wasn't even aware the biggest event in modern quilting - Quiltcon - was coming up until Julie posted about hosting #quiltnon2016 for those people who weren't going. I jumped at the chance to share a block tutorial and get in on the fun. And so far it really has been a blast to follow along on Instagram. Now it's my turn to host and share with you a mini tutorial for this 6" fancy fat cat block.
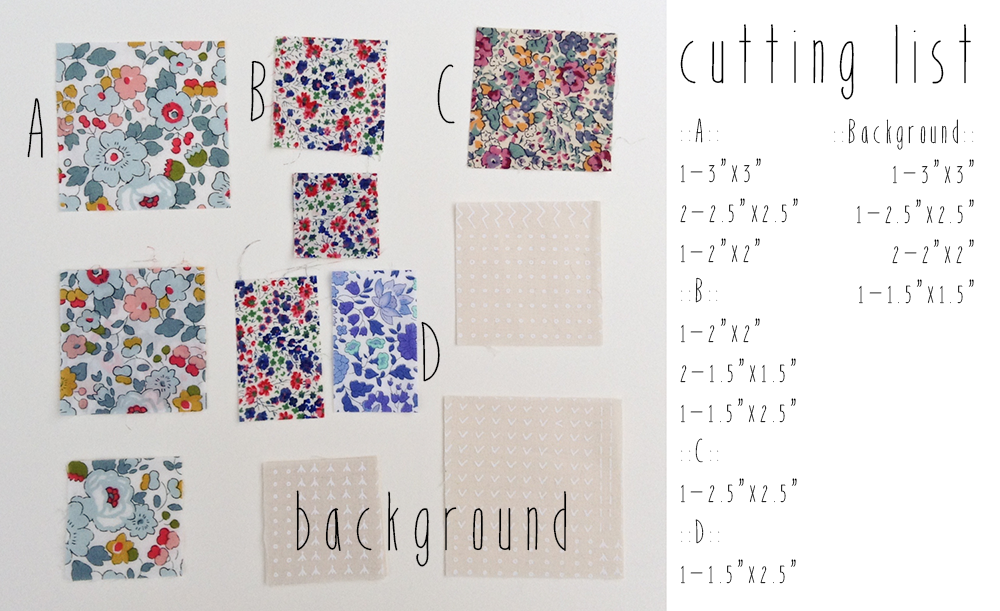
First, let's cut our fabrics. You will need the following:
::A::
1 - 3"x3"
2 - 2.5"x2.5"
1 - 2"x2"
::B::
1 - 2"x2"
2 - 1.5"x1.5"
1 - 1.5"x2.5"
::C::
1 - 2.5"x2.5"
::D::
1 - 1.5"x2.5"
::Background::
1 - 3"x3"
1 - 2.5"x2.5"
2 - 2"x2"
1 - 1.5"x1.5
Plus, if you would like to finish this one square as a mug rug {i.e. coaster}, you'll also need a 10"x10" square of batting, a 10"x10" piece of fabric for the backing, and something for the binding.
Step two is to sewing your 1/2 square triangle units. If this is new to you, this tutorial I wrote awhile back can be used as a reference. Make the following pairs:
::A+Background::
3"x3"
2"x2"
::B+Background::
2"x2"
The 3" units are squared up to 2.5". The 2" units are squared up to 1.5".
Next we'll lay out the individual units {squares, rectangles, and 1/2 square triangles you just made} as shown in the photo below. All seems are 1/4"!
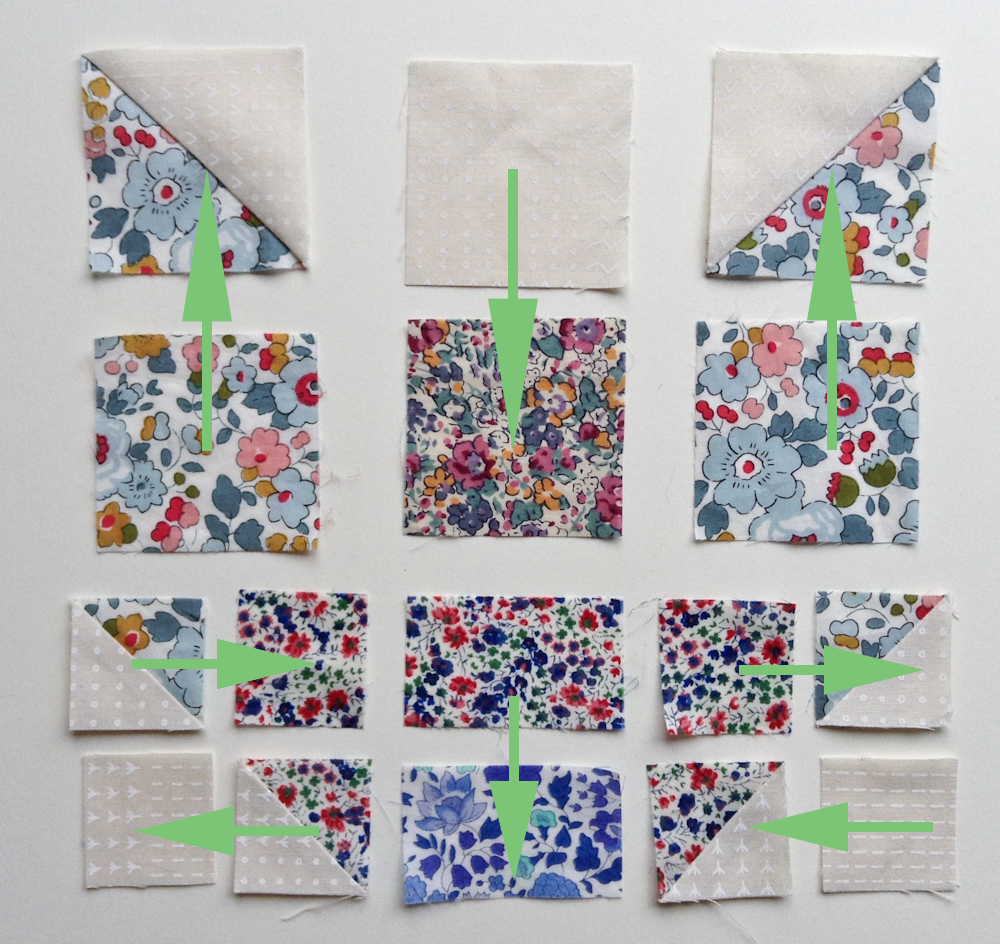
Sew the units together using the green arrows as your guide. In the top row, you'll be sewing the 2.5" squares together. In the bottom, you'll be sewing the 1.5" squares together and the 1.5"x2.5" rectangles along the long edge. To make the later piecing go more smoothly, press your seems in the direction of the arrows.
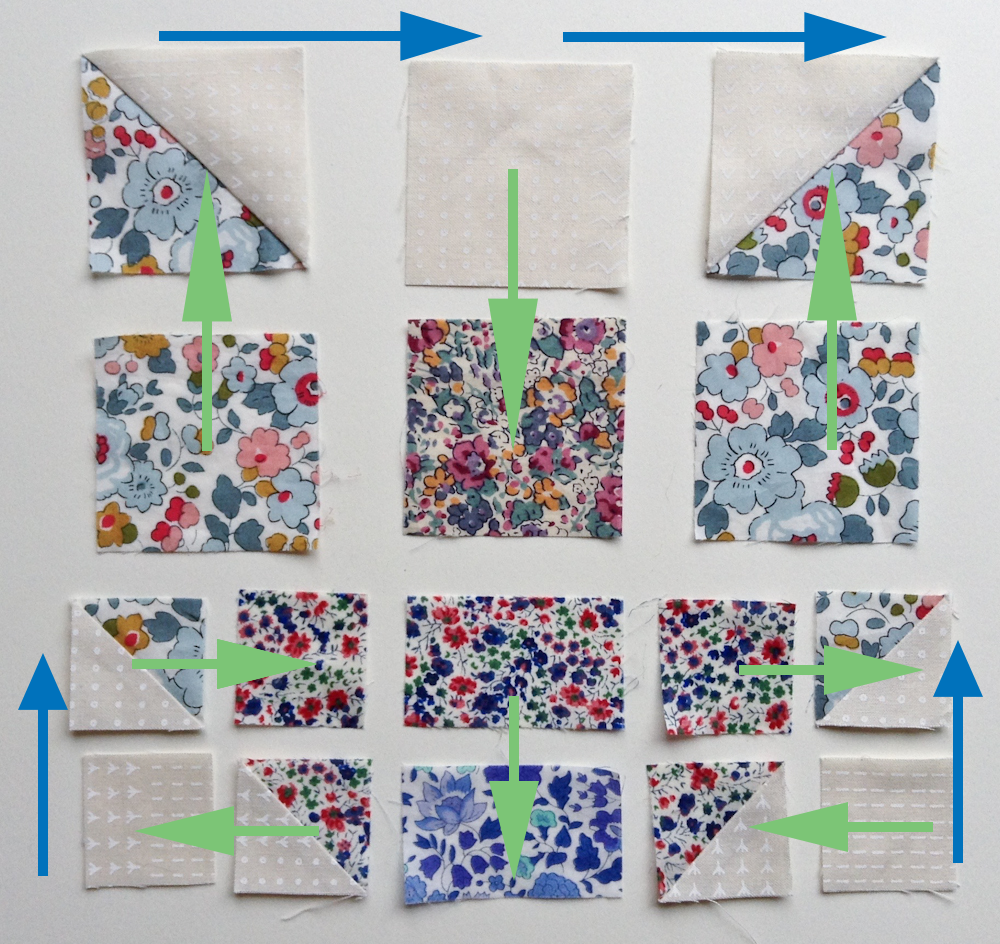
Continue sewing the pieced units together using the blue arrows this time as your guide. If you pressed the seems in the direction of the green arrows in the step above you should be able to "lock" the units together to help make sure all the corners match up. Here you'll be sewing the 2.5"x4.5" top row rectangles together and the 1.5"x2.5" bottom rectangles together along the long edges. This will create a 6.5"x4.5" unit and two 2.5"x2.5" units. Again, press your seems in the direction of the blue arrows.

Next, continue sewing the pieced units together using the pink arrows as your guide and "locking" the seems together. Here you'll be sewing the 2.5"x2.5" bottom units with the 1/2 square triangles in them to the 2.5"x2.5" bottom unit made of rectangles to create a 6.5"x2.5" rectangular unit. In the final piecing step, sew using the gray arrow as your guide and you'll have a 6.5"x6.5" square.
At this point, you can continue on with the other block tutorials that are included in the #quiltnon event. Make all the blocks and you'll be eligible to win a prize! Or... you can turn this one fancy fat cat block into a mug rug.
To finish this as a mug rug, layer your backing fabric face down, followed by your piece of batting, and the cat block on top face up. Add a couple basting pins and quilt the layers together to your heart's desire. Trim the edges so that the backing and batting extend 1/4" beyond the pieced top. My binding strip was cut at 3" wide and pressed in half. Sew the binding to the front using a 1/2" seem instead of 1/4" as used in all previous steps. Miter at the corners as you go. Fold the binding to the backside and hand stitch.
Pattern :: Fancy Fat Cat Block - designed by me
Fabrics
:: Liberty of London scrap pack - from MadForFabric
:: Blueberry Park - by Karen Lewis for Robert Kaufman
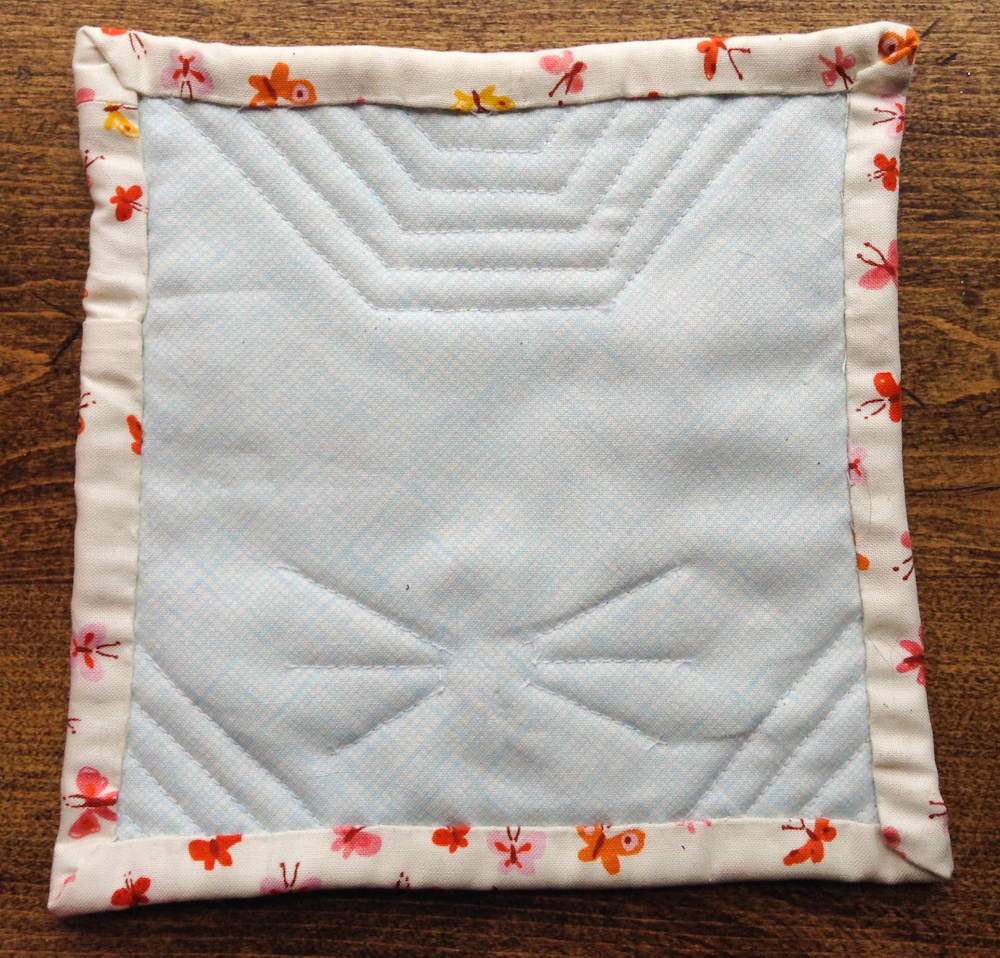 |
| A closer look at the quilting on the backside. Whiskers! |
Comments
Post a Comment